Nail art has transformed from a simple beauty trend to an essential component of personal style, allowing individuals to express their creativity and flair through their fingertips. Among the various techniques available, gel nail art has gained immense popularity due to its durability, versatility, and professional finish. Gel nails combine beauty with functionality, offering long-lasting designs that resist chipping and provide a glossy shine. This comprehensive guide will explore gel nail art in depth, covering everything from the basics of gel application to inspiring designs and care tips.
Gel nail art utilizes a specialized gel formula that provides a stronger and more durable alternative to traditional nail polish. Here are some key points about gel nails:
Gel nails typically require a specific application process that involves curing the gel under a UV or LED lamp. This curing process hardens the gel and allows it to last longer than regular nail polish, making it resistant to chipping and wear.
Gel nails can be designed in numerous ways, from classic solid colors to intricate nail art. The versatility of gel allows for creativity without compromising durability. You can incorporate glitter, gels, and even 3D elements to create unique designs.
One of the standout features of gel nail art is its long-lasting nature. With proper application and care, gel nails can last from two to four weeks without losing their luster or becoming damaged.
Gel nails provide a high-shine finish that enhances the overall appearance of your manicure. This glossy look does not dull over time, further contributing to the appeal of gel nail art.
While gel nails are robust, they can be removed safely with the right techniques. It is essential to follow proper removal methods to avoid damaging the natural nails.
While there are various nail art methods, gel nails offer several distinctive advantages. Here are some benefits of choosing gel nail art:
Gel nails are incredibly durable compared to traditional polishes. They resist chipping, scratching, and wearing, making them a popular choice for individuals with active lifestyles.
Gel nails can accommodate a wide range of styles, colors, and designs. Whether you prefer minimalist looks or intricate artwork, gel polish can be used to achieve your desired aesthetic.
Gel nails cure quickly under UV or LED lamps, allowing for faster application times. You can achieve beautiful nails in a fraction of the time it takes with traditional nail polish.
Once applied, gel nails require less maintenance than regular nail polish. They remain chip-free and glossy for weeks at a time, making them ideal for individuals with busy schedules.
When applied correctly, gel nails can be less damaging than acrylics or traditional polishes. They are flexible and allow your natural nails to breathe when applied properly.
To get started with gel nail art, it is important to have the right tools and products. Here’s a list of essentials you will need:
Gel Nail Polish: Invest in a variety of gel polishes in shades that you love. Popular colors include classic reds, soft pinks, and bold hues, along with trendy glitter and metallic options.
Base Coat: A quality base coat is necessary for ensuring proper adhesion and extending the longevity of your gel manicure.
Top Coat: A top coat adds a protective layer, enhancing shine and preventing chipping.
UV or LED Lamp: This is essential for curing gel polish. LED lamps generally cure polish faster than UV lamps.
Nail Art Brushes: A selection of fine-tipped brushes will help you create intricate designs.
Dotting Tools: Dotting tools are perfect for making dots and patterns, adding fun details to your nail art.
Nail Files and Buffers: These are essential for shaping your nails and creating a smooth surface.
Cuticle Remover and Tools: Proper cuticle care is important for the application process, ensuring clean edges.
Nail Wipes: Use lint-free wipes soaked in a cleanser to clean your nails before applying gel polish.
Nail Polish Remover (Acetone): This is necessary for removing gel polish safely when you're ready for a change.
Before starting your gel nail art project, proper nail preparation is crucial. Follow these steps to ensure a successful application:
Start by washing your hands thoroughly and removing any previous nail polish. Clean nails are essential for good adhesion and a flawless finish.
Using a nail clipper and file, shape your nails to your desired length and style. Popular shapes include square, almond, and stiletto.
Gently push back your cuticles using a cuticle pusher. This step ensures that the gel polish is applied evenly without interference.
Use a nail buffer to lightly buff the surface of your nails. This helps to create a smooth surface for the gel polish to adhere to and enhances the final appearance.
Using a lint-free wipe with a nail cleanser or rubbing alcohol, thoroughly cleanse your nails to remove any oils and dust. This step promotes better adhesion.
Once your nails are prepped, you can begin applying gel nail polish. Follow this comprehensive step-by-step guide for a flawless gel manicure:
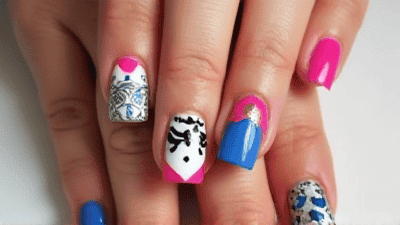
The true beauty of gel nail art lies in its versatility and potential for creativity. Here are some inspiring design ideas to get you started:
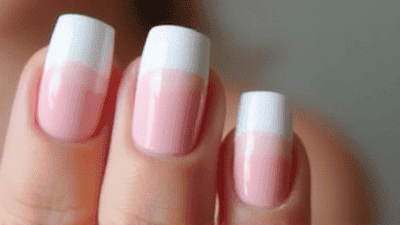
Upgrade the traditional French manicure by adding a pop of color to the tips. Instead of a classic white, opt for vibrant colors or even metallic shades for a modern look.
Create a stunning gradient effect using two or more gel colors. Blend shades seamlessly to achieve a soft gradient that transitions from one color to another.
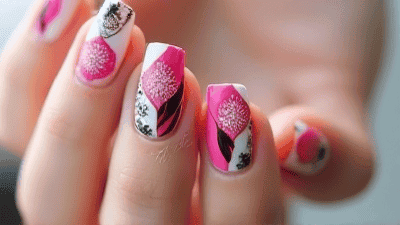
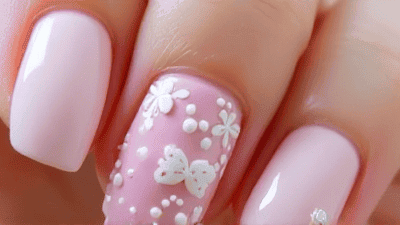
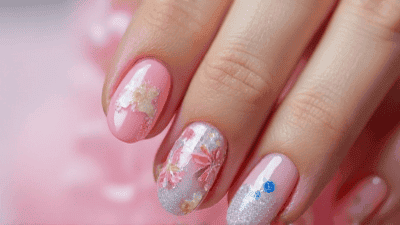
Incorporate delicate floral designs to bring a touch of nature to your nails. Use a fine brush to paint intricate flower patterns or apply decals for a quicker option.
Play with geometric shapes, such as triangles, stripes, or lines. Use contrasting colors to highlight the shapes and create a modern, edgy look.
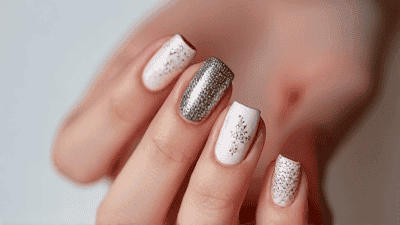
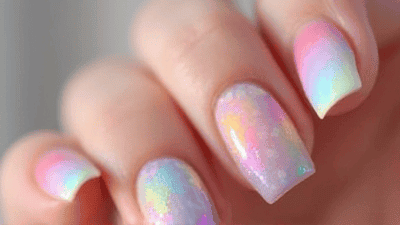
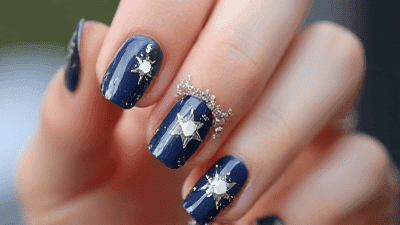
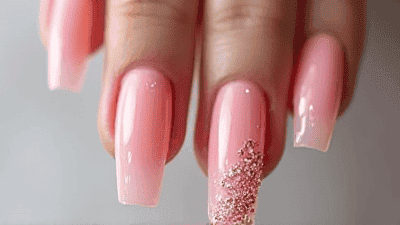
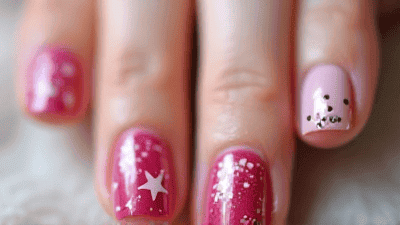
Add some sparkle to your gel manicure by incorporating glitter. Apply a glitter gel polish to specific nails or use it as an accent to create stunning effects.
Negative space designs allow the natural nail to show through. Create shapes or patterns that highlight the unpolished areas for a chic, minimalist look.
Channel your inner wild side with animal print designs. Try leopard spots or zebra stripes using gel polishes in bold colors.
Use metallic gels to add stunning detail to your manicure. Incorporate gold, silver, or chrome accents for a luxurious, rocker-chic effect.
For a trendy twist, create camouflage nail art using a mix of greens, browns, and neutrals. This unique design is perfect for those looking for something different.
Adapt your gel nail art to suit the seasons. Use soft pastels for spring, vibrant colors for summer, warm hues for fall, and deep, rich tones for winter.
While gel nail art can be incredibly satisfying, you may encounter common challenges. Here are some tips to troubleshoot potential issues:
If your color applies unevenly, ensure that you are using thin layers and allow each layer to cure completely before applying additional coats.
Bubbles can form if the gel polish is shaken too vigorously. Instead, gently roll the bottle between your palms before application to prepare it.
If your gel polish doesn’t cure properly, check the lamp’s wattage and ensure that it is functioning correctly. Ensure that you are using the correct gel products compatible with your lamp.
To prevent chipping or lifting, make sure your base coat is applied evenly, and always cap the free edge of your nails with polish.
When it comes time to remove your gel nails, soak a cotton pad in acetone and wrap it around your nails with aluminum foil. Leave it on for about 10-15 minutes before gently pushing the gel off with a cuticle pusher.
To maintain the beauty and longevity of your gel nails, follow these care tips:
Keep your nails away from harsh chemicals, such as strong cleaning agents or acetone-based removers. Use gloves when cleaning to protect your nails.
Apply cuticle oil and hand cream daily to keep your nails and hands hydrated. Proper moisture helps prevent breakage and keeps nails looking beautiful.
Avoid long soaks in water, as excessive exposure can weaken the nails and lead to lifting. Use shorter showers and avoid hot tubs if possible.
Treat your nails with care. Avoid using them as tools, and be gentle when typing, texting, or performing daily tasks.
To keep your gel nails looking fresh, consider scheduling regular touch-ups every two to three weeks. This allows you to maintain the beauty and integrity of your manicure.
Gel nail art provides a unique and versatile way to express your creativity while enjoying long-lasting and beautiful nails. With the right tools, techniques, and a bit of imagination, you can create an array of stunning designs to suit any occasion or personal style.
Whether you opt for classic elegance, trendy designs, or striking motifs, gel nails allow you to showcase your individuality and express your artistic flair. As you experiment with various techniques and styles, remember to prioritize proper nail care and maintenance to keep your nails healthy and stunning.
Embrace your gel nail art journey and enjoy the process of creation. With practice and creativity, you can transform your nails into a true work of art that reflects your unique personality and style.